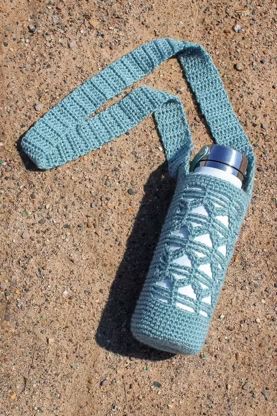
Crochet Covers for your Water Bottles. If you’re looking for a charming way to add a touch of elegance and personality to your everyday routine, we have the perfect solution for you: crochet water bottle covers! There’s nothing quite like the feeling of creating something with your own hands, especially when the end result is so beautiful and useful. In this tutorial, we’ll lovingly guide you through each step of the process, ensuring that you have fun while weaving these adorable covers that will transform your ordinary bottles into true works of art.
Step 1: Choice of Materials:
Before you can start working your crochet magic, you’ll need to choose the right materials. Opt for a soft, colorful crochet yarn that will add liveliness to your cover. Grab a crochet hook that is the right size for your chosen yarn, ensuring your stitches are even and nice.
Step 2: The Magic Point of the Ring:
To start your work of art, start with the famous “magic ring”. This starting point is like a portal to a world of creativity. Slip the strand around two fingers, forming an X, and insert the hook under the first strand. Gently pull to create a small loop. Now, work some single crochets inside the ring and tighten the center strand to close it. This is the starting point for your cover.
Step 3: Growing with Creative Points:
Now that your magic ring is ready, it’s time to explore different crochet stitches to create unique textures. Try high points, low points, and even the popcorn stitch to add dimension and flair to your cover. Remember, each dot is like a brushstroke on your canvas, bringing your creation to life.
Step 4: Choosing Colors and Patterns:
One of the most exciting aspects of crochet is the variety of colors available. Choose a palette that conveys your personality and aligns with your style. You can create simple patterns like stripes or checks, alternating colors in each row. This will ensure your cover is an authentic expression of who you are.
Step 5: The Enchanting Finishing Touch:
Once you’ve completed the main body of the cover, it’s time to add the enchanting final touch. You can add a crochet string at the top to tie your cover to the bottle, or even apply embossed crochet flowers for a romantic look. Let your creativity flow and add that detail that makes all the difference.
Step 6: Celebrate Your Achievement:
As you finish your crochet water bottle cover, take a moment to admire your creation. You’ve turned a handful of yarn into a charming and functional piece. Appreciate the time and dedication you put into it and know that you now have a unique cover that will fill your day with joy.
Creating crochet water bottle covers is more than just a hobby; it’s a way to add beauty and love to your everyday life. With each stitch you weave, you are creating a unique piece that reflects your personality and artistic ability. So don’t hesitate: grab your needles, pick your favorite colors and start creating! In no time, your water bottles will be enveloped in delicacy and charm, making each sip even more special.
If you liked this step by step, but want to see some other craft inspirations, below we will leave some more options:
Crochet Tea Cup To Use As Decor
Access the Free Crochet Pattern (PDF)
We wish you all an excellent week, full of God’s blessings in your homes, with peace, love, harmony, happiness, and especially a lot of creativity, to create the most beautiful handicrafts.
With love and affection Crochet Step by Step!