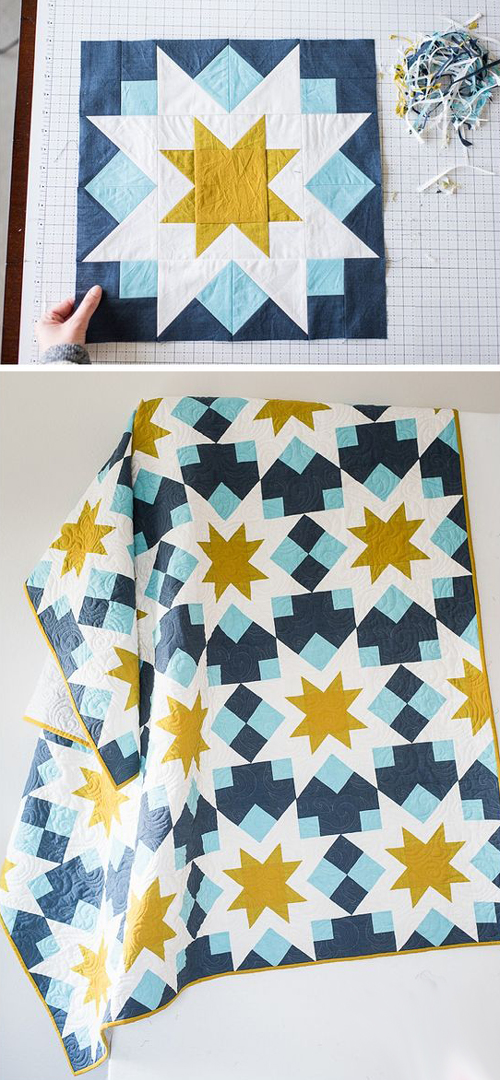
A “Night Stars Quilt Pattern” is a quilt pattern inspired by the night sky, where bright stars appear to glow against a dark background. Creating this pattern can seem complicated, but with a few tips and a little creativity, you can make a stunning quilt. Here is a simple guide to creating a Night Stars Quilt Pattern:
Necessary materials:
Dark colored fabrics (preferably navy blue or black) for quilt backing.
Fabrics in light colors (white, light yellow or light gray) for the stars.
Fabric scissors.
Sewing ruler.
Sewing machine or needle and thread if you prefer to sew by hand.
Cutting base and rotary cutter (optional, but makes the process faster and more accurate).
Step by step:
Pattern Choice: Decide what size quilt you want to create and choose a star pattern that fits the size you choose. There are many patterns available online or in quilting books. A simple option is the “eight-pointed star” pattern.

Cutting the Fabrics: Cut the dark fabrics into squares or rectangles the size you need to form the bottom of the quilt. Also cut the light fabrics into strips, then cut these strips into smaller squares or rectangles to form the stars. Accuracy is important in this step, so if you have a cutting mat and a rotary cutter, it will be easier to get accurate measurements.
Assembling the stars: Now, it’s time to assemble the stars. Eight-pointed stars can be made by joining four light squares in an X-array, then adding four dark squares at the ends. There are many other pattern options, so feel free to experiment with different star configurations.
Arrangement: Play around with the arrangement of the stars and the dark background to find the design that suits you best. You can position the stars in a uniform or random pattern, creating a more natural, starry night sky.
Sewing: Join the pieces together, pinning them together so they stay in place before sewing. Sew the pieces individually to form each star, then sew the stars onto the dark background.
Finishing: After assembling all the pieces, press the quilt well and, if necessary, trim the edges so that they are straight and even.
Quilting: Now that the quilt top is ready, it’s time to prepare the “sandwich” with the batting and backing fabric. You can use acrylic blanket as stuffing and a fabric of your choice for the back of the quilt. Quilt, which is the sewing that joins the three layers together, creating a pattern that enhances the design of the quilt.
Finishing Finish: Finish your quilt by securing the edge with a hem or using a bias finish for a more professional look.
Now you have a Night Stars quilt ready to be admired and used. Remember, creativity is the limit, so feel free to experiment with different colors, sizes, and star patterns to create your own unique quilt. Enjoy the creation process and the end result, as quilting is an art form that offers joy at every step. Good luck!
Go to the free quilt pattern/ Night Stars Quilt Pattern
If you liked this free quilt pattern, but still want to see some more options, we’ll leave you with other quilts below for your inspiration:
Inspired QuiltWe wish all our readers an excellent week, full of blessings, with lots of joy, peace, love and creativity to create the most beautiful quilt patterns. Whenever you want to leave your comments with your works, we love to see the arts of our readers.
With much respect and love, Crochet Step by Step!


