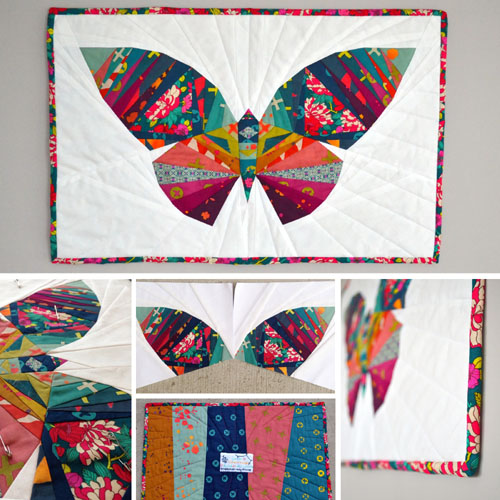
Making a butterfly inspired quilt can be a delightful and fun project for sewing and craft lovers. In this simple and creative guide, I’ll show you the basic steps to create a beautiful butterfly-themed quilt.
Necessary materials:
Colorful Fabrics: Choose a variety of fabrics in colors that resemble butterfly wings. It can be a mix of shades of blue, green, pink, yellow and purple, or whatever colors you like the most.
Background Fabric: Select a neutral or light-colored fabric that will serve as the background for your quilt.
Ruler and circular cutter (or fabric scissors).
Sewing pins.
Sewing machine or needle and thread for hand sewing.
Material for filling the quilt (acrylic blanket or other padded material).
Fabric for lining the quilt.
Quilting thread or regular thread.
Step by step:
Planning and design:
Before you begin, draw a simple sketch of your quilt design. Think about how many butterflies you want to include, how big they will be, and how they will be distributed on the background fabric. You can find inspiration on the internet or create your own unique design.
Fabric cut:
Using the ruler and circular cutter (or fabric scissors), cut the colored fabrics into butterfly wing shapes. Remember to make pairs for each butterfly. Also, cut squares or rectangles from the background fabric, where you will place the butterflies.
Assembling the Butterflies:
Position the pairs of butterfly wings, right sides of the fabrics facing each other, and pin them together. Sew around the edges, leaving an opening on one side so you can turn the piece right side out. Trim the excess fabric from the edges, being careful not to cut the seam. Turn the wings to the right side and press them with an iron to smooth.
Positioning on background fabric:
Now it’s time to position the butterflies on the background fabric so that they are evenly distributed. Play around with the positions until you find the arrangement that suits you best. One tip is to create a pattern, like a butterfly flight, or leave them scattered randomly.
Assembling the quilt top:
With the butterflies in place, pin them to the backing fabric to temporarily secure them. Then sew each butterfly onto the backing fabric using the sewing machine or hand stitching. You can use threads of different colors to give it a special touch.
Padding and finishing:
After attaching the butterflies, place the stuffing (acrylic blanket or other padded material) under the top of the quilt and add the fabric for the backing. Pin the three layers together to prevent slipping during quilting.
Quilting:
Quilting is the process of sewing the three layers of the quilt together to ensure that it is snug and well-finished. You can make straight lines following the outline of the butterflies or create more elaborate patterns like concentric circles or waves. This is the time to unleash your creativity!
Final touch:
After quilting, trim the edges of the quilt to a rectangular shape or to your liking. Finish with a finishing seam around the edges to prevent fraying.
And ready! You have created a beautiful Butterfly Inspired Quilt, perfect for decorating your home or gifting someone special. Remember to have fun throughout the process and don’t be afraid to experiment with new ideas and color combinations. Quilting is an art form, and the beauty is in its uniqueness and the love you put into each stitch!
Access the free quilt pattern/ Butterfly Inspired Quilt
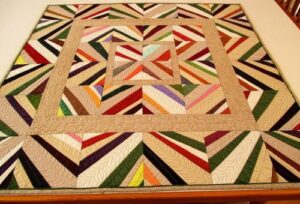
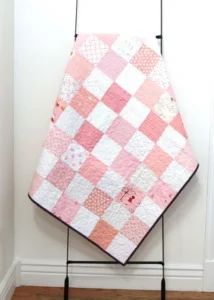
If you liked this free quilt pattern, but still want to see some more options, we’ll leave you with other quilts below for your inspiration:
We wish all our readers an excellent week, full of blessings, with lots of joy, peace, love and creativity to create the most beautiful quilt patterns. Whenever you want to leave your comments with your works, we love to see the arts of our readers.
With much respect and love, Crochet Step by Step!