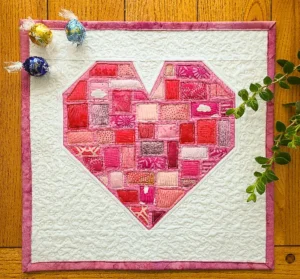
The Liberated String Medallion Quilt is a unique and fun way to create a beautiful quilt without being bound by strict patterns. It’s a liberated technique, which means there are no hard and fast rules to follow, allowing your creativity to flow freely. In this guide, I’ll show you how to make this type of quilt in a simple, fun and completely personalized way.
Materials you will need:
Assorted fabric scraps: assemble a collection of colorful, printed and textured fabrics in different sizes. It can be a great way to use up leftovers from other projects.
Backing Fabric: A neutral fabric to be the backdrop for your quilt.
Scissors: to cut the scraps to the desired size.
Sewing machine: to join the scraps and create the top of the quilt.
Ruler and circular cutter (optional): to cut scraps precisely.
Iron: to smooth fabrics while working.
Step 1: Prepare the scraps
Start by separating the scraps by colors and prints. Don’t worry about making them all the same size, as the idea here is that they have different shapes and lengths. Diversity is the secret!
Step 2: Cut the background fabric
Cut a large piece of neutral fabric to be the center of your quilt. The size is completely flexible, but something around 30×30 cm can be a good starting point.
Step 3: Create the center of the quilt
Place a scrap in the center of the backing fabric and sew it in place. Here, you can use straight stitches, zigzag stitches, or even make some decorative seams. Remember, the idea is to be liberated and creative!
Step 4: Add more scraps
Starting from the center, continue adding flaps all around, creating a medallion. Sew each patch randomly, overlapping them and creating interesting combinations of colors and textures. Play with angles and layouts for a more dynamic effect.
Step 5: Explore different directions
As you move forward, allow yourself to change direction. Add new flaps to existing edges, creating a more laid-back, deconstructed look. Don’t be afraid to cut some scraps in half and use them in different parts. Remember to always smooth and iron the fabrics for a more professional result.
Step 6: Finish the quilt
Continue adding scraps and enlarging the quilt until it reaches the desired size. The final measurement is up to you – it could be a small baby quilt or throw pillow, or a large bed quilt for the whole family. There are no rules!
Step 7: Finishing
Once you’re satisfied with the size and appearance of the quilt, it’s time to finish the quilt. Add a border around the quilt for a finishing touch. Choose a fabric that complements the patchwork you’ve already used and that harmonizes with the overall style of the quilt.
Step 8: Padding
The last step is to do the padding. You can choose between hand or machine quilting. Quilt along the seams and in geometric patterns, or just go with your gut and do some free and fun quilting.
And ready! Your Liberated String Medallion Quilt is now complete. It will be unique, full of color and an expression of your creativity. Use it to decorate your home, gift someone special, or just enjoy a project made with love and freedom. Always remember to have fun and let your imagination fly!
Access the free quilt pattern/ Liberated String Medallion Quilt
If you liked this free quilt pattern, but still want to see some more options, we’ll leave you with other quilts below for your inspiration:
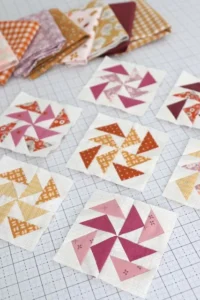
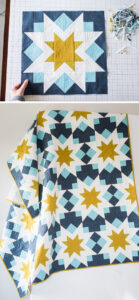
Rosewood Star Quilt Pattern
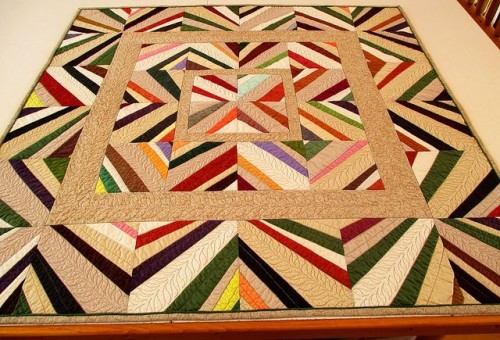
Twisted Bargello Quilt
Cloth Pegs Basket Quilt
We wish all our readers an excellent week, full of blessings, with lots of joy, peace, love and creativity to create the most beautiful quilt patterns. Whenever you want to leave your comments with your works, we love to see the arts of our readers.
With much respect and love, Crochet Step by Step!