If you like sewing, crafting and want to dive into a unique and creative project, making a Pixelated Rose Quilt could be the perfect choice! This patchwork technique combines the charm of traditional quilts with a modern and vibrant touch. Let’s dive into this exciting journey and learn step by step how to create a true welcoming work of art.
Necessary materials:
Colorful fabrics in shades of pink, green and white (or the colors of your choice).
Ruler for patchwork.
Circular cutter or sharp scissors.
Cutting board.
Sewing machine (optional, but recommended)
Sewing thread.
Pins.
Acrylic blanket or fabric for filling the quilt.
Fabric for the quilt lining.
Iron.
Step 1: Planning
Before you start cutting your fabrics, it’s important to plan your Pixelated Rose Quilt design. Choose an image of a rose or other flower that you love and want to reproduce in pixelated format. You can use image editing software or even graph paper to help visualize the design.
![]()
Step 2: Choosing Fabrics
Now it’s time to select the fabrics. Opt for a variety of shades of pink to create the pixel illusion, as well as shades of green for the stem and leaves. The white can be used as a background or as part of the pixels to make the rose stand out. Make sure the fabrics complement each other and create a nice contrast.
Step 3: Cutting the Fabrics
With the fabrics chosen, it’s time to cut them. Use the ruler and circular cutter to cut identically sized squares in each color. Their dimension will depend on the final size you want your quilt to be, so plan ahead.
Step 4: Assembly of the Pixelado
Now is the magical time to assemble the pixelated! Take the reference image you planned in Step 1 and start creating the pattern on the floor or a large table. Place the fabric squares side by side, following the pixelated design.
Step 5: Sewing
After assembling the pixels in the correct order, it’s time to join the fabric squares with the sewing machine. Carefully stitch each row and column, ensuring the pixels line up perfectly. If you prefer, you can sew by hand, but the machine will make the process faster and more accurate.
Step 6: Assembling the Quilt
With the pixelation complete, it’s time to assemble the quilt itself. Take your chosen acrylic blanket or batting fabric and place it on a clean surface. Then place the top of the quilt (the pixelated one) right side up on top of the batting.
Step 7: Quilt Lining
Lay the fabric chosen for the lining over the top of the quilt, lining up the corners and edges. Make sure all layers are snug and pin along the entire quilt to keep it in place.
Step 8: Finishing
Now it’s time to put the finishing touches on. Sew around the entire quilt, leaving a small opening at one edge so you can turn your work right side out. After turning, close the opening with invisible stitches.
Step 9: Appreciate Your Work of Art
Congratulations! Your Pixelated Rose Quilt is ready! Now, it’s time to enjoy your welcoming work of art and proudly share the result of your work with friends and family. This special quilt will warm the heart and bring a touch of creativity and warmth to any environment.
Remember, just like any craft project, practice makes perfect. Have fun experimenting with different designs and colors, and don’t be afraid to let your creativity blossom. Enjoy the process and, above all, the love and care you are investing in every stitch of this beautiful quilt. Happy sewing!
Go to the free quilt pattern/ Pixelated Rose Quilt
If you liked this free quilt pattern, but still want to see some more options, we’ll leave you with other quilts below for your inspiration:
Liberated String Medallion Quilt
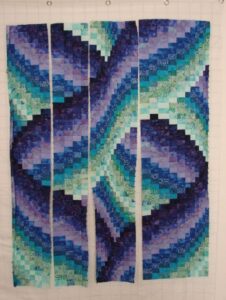
Twisted Bargello Quilt
Cloth Pegs Basket Quilt
We wish all our readers an excellent week, full of blessings, with lots of joy, peace, love and creativity to create the most beautiful quilt patterns. Whenever you want to leave your comments with your works, we love to see the arts of our readers.
With much respect and love, Crochet Step by Step!